
Ring Light & Camera Setup for DIY Hair Tutorials
We've all been there – you've perfected an amazing protective style or discovered a game-changing wash day routine, but when you hit record, the footage looks nothing like the gorgeous results you achieved. Poor lighting washes out your hair's natural texture, shaky cameras miss those intricate braiding details, and muffled audio makes your expert tips hard to follow.
We've all been there – you've perfected an amazing protective style or discovered a game-changing wash day routine, but when you hit record, the footage looks nothing like the gorgeous results you achieved. Poor lighting washes out your hair's natural texture, shaky cameras miss those intricate braiding details, and muffled audio makes your expert tips hard to follow.
Affiliate disclosure: As an Amazon Associate, we earn from qualifying purchases.
After 15 years of helping clients document their hair journeys and training stylists in content creation, we've learned that the difference between amateur-looking videos and professional tutorials isn't expensive equipment – it's knowing how to set up what you have correctly. Whether you're sharing your natural hair journey on TikTok or building a YouTube channel, the right setup makes your expertise shine through crystal-clear footage.
Essential Equipment for Professional DIY Hair Tutorials
Let's start with the foundation of great hair tutorial videos. You don't need to break the bank, but investing in a few key pieces will dramatically improve your content quality.
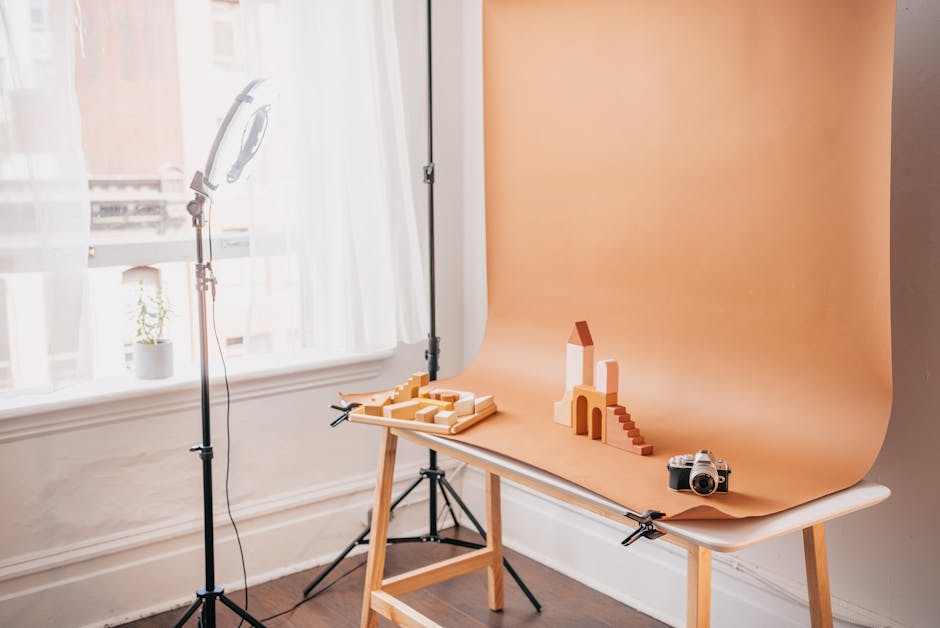
Ring lights are the cornerstone of professional-looking hair videos. For most DIY creators, an 18-inch ring light provides the perfect balance of coverage and portability. Look for models with adjustable color temperature (3200K-5600K) so you can match different lighting conditions throughout the day. The Neewer 18-inch LED Ring Light Kit offers excellent value with its smartphone holder and adjustable stand.
Camera choice depends on your budget and goals. Smartphones have come incredibly far – the latest iPhone and Samsung models shoot 4K video that rivals dedicated cameras. However, if you're serious about content creation, mirrorless cameras like the Canon EOS M50 Mark II offer superior autofocus and image quality for hair texture details.
Stability is crucial for professional-looking footage. A sturdy tripod prevents the shaky, amateur look that immediately signals low-quality content. The Manfrotto Compact Action Tripod provides excellent stability while remaining lightweight enough for easy repositioning.
Audio quality often gets overlooked, but viewers will tolerate poor video quality far longer than bad audio. A simple lapel microphone like the Rode Wireless GO II ensures your hair care tips come through clearly, even when you're moving around during styling demonstrations.
Step-by-Step Ring Light Setup for Hair Videos
Positioning your ring light correctly makes the difference between flat, unflattering footage and vibrant videos that showcase your hair's true beauty. We've seen countless creators struggle with this seemingly simple step.
Height matters more than most people realize. Position your ring light at eye level when you're seated in your filming position. This creates the most flattering illumination for both your face and hair, avoiding harsh shadows under your chin or unflattering overhead lighting that flattens your hair's dimension.
Distance is equally critical. Place the ring light 3-4 feet away from your filming position. Too close creates harsh hotspots that wash out detail, while too far reduces the light's effectiveness. We've found this sweet spot provides even illumination without overwhelming brightness.
Angle adjustments become crucial when working with different hair lengths and textures. For longer styles, tilt the light slightly downward to ensure even coverage from roots to ends. When filming protective styles or intricate updos, a straight-on angle works best to minimize shadows in detailed work.
Color temperature settings require attention to your specific needs. Start with 4000K for most indoor filming – it's neutral enough to look natural while providing sufficient warmth to complement most skin tones. Adjust warmer (3200K) for cozy, intimate tutorials or cooler (5600K) when matching bright daylight from windows.
Remember that ring lights create a distinctive catchlight in your eyes, which looks professional and engaging. Position yourself so this catchlight appears natural – typically at the 10 o'clock or 2 o'clock position in your pupils.
Camera Positioning and Angle Strategies
Strategic camera placement transforms good content into great content by capturing every detail of your hair techniques. After years of filming tutorials, we've developed specific positioning strategies for different types of content.
Your primary camera should be positioned at chest height, angled slightly upward. This angle is most flattering for demonstrations while keeping your hands and hair work clearly visible. For smartphone users, the UBeesize Phone Tripod offers excellent adjustability for finding the perfect angle.
Secondary angles add professional polish to your tutorials. An overhead mirror shot works beautifully for scalp care routines and parting techniques. Position a small mirror at a 45-degree angle behind your head, then film the reflection to show viewers exactly what you're doing to your scalp.
Side profile shots excel for showcasing length, curl patterns, and the true shape of protective styles. Set up a second camera or smartphone at 90 degrees to your primary angle. This perspective reveals details that straight-on shots miss, particularly important for twist-outs, braid-outs, and wash-and-go styling.
Focus settings require special attention for hair content. Use single-point autofocus rather than automatic area focusing to ensure your hair remains sharp while backgrounds blur attractively. Most smartphones offer touch-to-focus features – tap your hair on the screen before recording to lock focus where it matters most.
Depth of field considerations become important as you advance. A slightly blurred background (achieved through wider apertures or portrait modes) makes your hair pop while eliminating distracting elements in your filming space.
Lighting Techniques for Different Hair Tutorial Types
Different hair tutorials require specific lighting approaches to capture the best results. We've learned these techniques through countless hours of filming various hair care routines.
Wash day routines present unique challenges. Water creates reflections that can cause harsh glare spots in your footage. Position your ring light slightly off-center and use a diffuser (even a sheer curtain works) to soften the light. This prevents the blinding reflections while maintaining enough brightness to show scalp health and product application clearly.
Protective styling tutorials need precise lighting to capture intricate details. Increase your ring light to maximum brightness and position it directly in front of your work area. The goal is eliminating all shadows that might hide your braiding, twisting, or loc techniques. Consider adding a small LED panel light from above to further reduce shadows in detailed hand work.
Heat styling requires careful management of reflections from hot tools and products. Matte-finish tools reflect less light than glossy ones, but you'll still need to angle your lighting to avoid glare. Position lights at 45-degree angles rather than straight-on to minimize reflections while maintaining adequate illumination.
Color treatments demand accurate color representation. Use daylight-balanced lighting (5600K) to ensure your hair color appears true-to-life on camera. This becomes especially important for before-and-after comparisons where viewers need to see actual color changes rather than lighting-induced differences.
Before-and-after reveals require consistent lighting setups. Mark your light positions with tape so you can recreate identical lighting conditions for comparison shots. Even small changes in lighting can make dramatic differences appear less impressive or create false impressions of your results.
Audio Setup for Clear Hair Tutorial Narration
Crystal-clear audio transforms amateur videos into professional tutorials that viewers actually want to watch. Poor audio quality causes viewers to click away faster than any visual issue.
Lapel microphone placement requires special consideration for hair tutorials. Clip the mic to your shirt collar, about 6-8 inches below your chin. This distance captures clear speech while staying far enough from your hair to avoid rustling sounds when you move. The Audio-Technica ATR3350iS offers excellent quality at a budget-friendly price point.
Wireless systems provide freedom of movement essential for hair styling demonstrations. The Rode Wireless GO II system we mentioned earlier allows you to move naturally while maintaining consistent audio quality. This becomes crucial during protective styling tutorials where you need to move around your model or adjust your own position frequently.
Smartphone audio recording often gets overlooked, but built-in mics can work well with proper technique. Speak clearly and maintain consistent distance from your phone. Apps like TikTok's voiceover feature allow you to record narration separately, giving you more control over audio quality.
Background noise reduction starts with your filming environment. Choose the quietest room in your home, ideally with soft furnishings that absorb sound. Turn off air conditioning, fans, and other appliances during recording. Even small background noises become distracting when amplified through speakers or headphones.
Audio monitoring during recording prevents disappointing discoveries in post-production. Use headphones or earbuds to monitor your audio levels while filming. This allows you to catch and correct issues immediately rather than discovering them after completing a lengthy tutorial.
DIY Studio Setup on Any Budget
Professional-looking hair tutorials don't require professional budgets. We've helped creators at every level build effective setups that produce excellent results.
Under $100 setups focus on smartphone optimization. The UBeesize Phone Tripod ($25), a basic ring light ($35), and a simple lapel mic ($30) create a solid foundation. This budget setup produces dramatically better results than handheld phone videos while remaining accessible to beginning creators.
$100-$300 budgets allow for significant quality improvements. Add the Neewer 18-inch ring light kit ($80), upgrade to a wireless microphone system ($120), and invest in a quality smartphone gimbal ($100) for smooth movement shots. This mid-range setup rivals much more expensive configurations when used correctly.
$300+ budgets enter semi-professional territory. The Canon EOS M50 Mark II camera ($600), professional lighting kit ($200), and advanced audio equipment ($150) create studio-quality results. However, remember that technique matters more than equipment – we've seen $1000+ setups produce worse results than well-executed budget configurations.
Space optimization becomes crucial in small apartments or shared spaces. Foldable ring lights and collapsible tripods allow you to set up and break down quickly. The Neewer Portable Light Stand folds to just 2 feet long while extending to 6 feet when needed.
Storage solutions keep your equipment organized and protected. A simple plastic storage bin holds all your equipment between filming sessions, while protecting expensive items from damage. Label cables and keep batteries charged so you're always ready to film when inspiration strikes.
Troubleshooting Common Setup Issues
Even experienced creators encounter technical challenges. We've compiled solutions to the most common problems we see in hair tutorial filming.
Shadow elimination requires strategic light placement. If you're seeing harsh shadows on one side of your face or hair, add a fill light (even a desk lamp with white paper as a diffuser) on the opposite side. The goal isn't matching intensity but reducing the shadow contrast to acceptable levels.
Color balance problems often stem from mixed lighting sources. Turn off overhead lights when using your ring light, or ensure all lights match the same color temperature. Mixed lighting creates color casts that make your hair appear unnatural and require time-consuming correction in editing.
Camera shake issues plague many creators, especially when demonstrating techniques. Ensure your tripod legs are fully extended and locked. On carpet, push tripod feet firmly into the pile for extra stability. For handheld shots, brace your elbows against your body and breathe steadily to minimize movement.
Product reflections can ruin otherwise perfect footage. Matte finishing sprays work on glossy hair products to reduce reflections. For tools, angle them slightly away from your main light source. Sometimes repositioning your setup by just a few degrees eliminates problematic reflections entirely.
Quick fixes for technical difficulties save filming sessions. Keep backup batteries charged, have extra memory cards available, and know your equipment's basic troubleshooting steps. Many creators lose momentum when technical issues interrupt their flow, so preparation prevents frustration.
Frequently Asked Questions
What's the minimum equipment needed to start filming hair tutorials?
A smartphone, basic tripod, and ring light create professional-looking results for under $100.
How do I get professional lighting in a small space?
Use foldable ring lights and position them close to walls to maximize coverage in compact areas.
Can I use natural window light instead of a ring light?
Window light works but varies throughout the day, making consistent results difficult for regular content creation.
What camera settings work best for hair texture capture?
Use single-point autofocus, slightly higher contrast, and ensure adequate shutter speed to avoid motion blur.
How do I film overhead shots without blocking the light?
Use a mirror at 45 degrees behind your head, or mount your camera on an adjustable arm.
Creating professional-quality hair tutorials becomes achievable when you understand the fundamentals of equipment setup and lighting techniques. Remember that consistency matters more than perfection – viewers connect with authentic content that genuinely helps them achieve better hair care results.
Start with basic equipment and focus on mastering your technique before investing in expensive upgrades. The most successful hair tutorial creators we know began with simple setups and gradually improved their equipment as their skills and audience grew. Your expertise and personality matter far more than having the latest camera or most expensive lighting setup.
Take action today by setting up your filming space and recording your first tutorial. Every expert creator started with that first imperfect video, and your unique perspective on hair care deserves to be shared with the world.
Recommended Products
- Neewer 18-inch LED Ring Light Kit – Professional lighting with smartphone holder and adjustable stand.
- Canon EOS M50 Mark II – Mirrorless camera with excellent autofocus for hair detail capture.
- Manfrotto Compact Action Tripod – Lightweight yet stable support for professional-looking footage.
- Rode Wireless GO II – Wireless microphone system for clear audio during movement.
- UBeesize Phone Tripod – Versatile smartphone mount with remote control for solo filming.